
Setting Up and Running an Art Festival Booth
Art festivals are my happy place. As a kid I loved visiting art festivals, craft markets and pop-up art events with my family. I wandered the rows of booths and marveled over the unique artwork crafted by makers from across the nation who opened shop each weekend. Being among the creatives and entrepreneurs piqued my interest in exploring the magic of these events from the perspective of a seller rather than a shopper.
As a professional artist, I've had the pleasure of vending at more than 100 art events—from small, one-day pop-ups to huge weekend festivals that take over an entire city. With each festival experience—from doing art demos in front of a crowd to setting up a booth during a rainstorm—I discover ways to run my booth more efficiently and effectively. If you're interested in learning about the ins and outs of setting up and running a booth at an art festival, this blog offers a behind-the-scenes look at my tried-and-true process!

Planning an Art Festival Booth Layout
Most art festivals are juried by a selection committee. This means that any hopeful vendors will need to apply and pay a non-refundable application fee (typically in the neighborhood of $10–$40). The next step is to wait patiently for a decision from the committee. Once accepted, it's time to pay the booth fee and get to work planning your booth layout. The most common booth space is 10'x10'—and it's almost always the size assigned for outdoor art shows (which makes sense because the standard tent size is 10'x10').
As the vendor, you're responsible for equipping yourself with everything you need to fill your allotted space, including the tent. This can come as a shock to first-time vendors and potentially drive up costs significantly—especially when factoring in essentials such as pop-up tents, tent weights for each corner (to prevent your tent from blowing away with the wind), folding tables, chairs and lightweight, portable displays. To make this experience easier on yourself and your finances, I strongly suggest starting out slowly by borrowing as much as you can. This approach will give you an idea of you can and can't live without before investing too much money in your equipment.
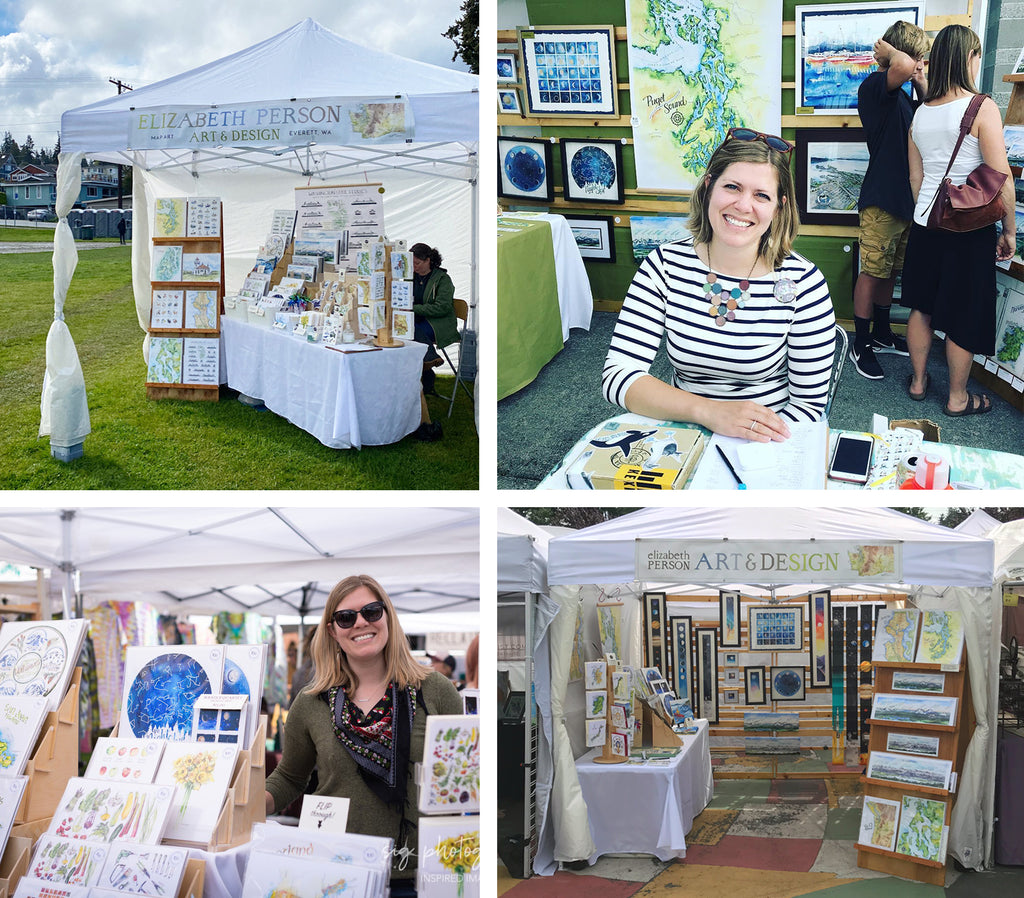
Clockwise from top left: Photo by EPAD, Photo by Everett Music Initiative, Photo by SIG Photography, Photo by EPAD
For my first festivals, I borrowed a tent and tent weights from a friend. This saved me about $400 until I built up my business enough to buy a tent setup myself. I was also able to borrow a folding table. I even went "shopping" in my house for display items and supplemented with display props from thrift stores.
Over the years, I've invested in more festival-friendly equipment and all different types of display methods. While I'm excited to have a more elaborate booth setup today, it's nice to revisit my earlier festivals to see how far I've come. Here's a look at my very first market setup—an indoor makers market I worked in 2016. I was able to fit everything in the backseat of my car!

After securing your equipment, you'll need to configure a booth layout. I use graph paper or Adobe Illustrator to play around with different layouts. You'll want to have several different layout options to account for a number of factors, including unpredictable weather, booth positioning (corner booths require a different setup) or highlighting certain products.
For my biggest festivals, I often go to the extreme of setting up my full booth display weeks before an event so I get a live visual of my layout and the "booth flow" going into the event. Examining your booth flow ahead of time will help you think through any questions that may arise during the festival. If you have a line to checkout, where will people naturally form a queue? Will the line block your art on display? If you get direct sun on one side of your booth, where will you want to be sitting? Does your booth layout invite curious shoppers? Are the entrance and exit points easily accessible for shoppers? There are countless scenarios for you to consider to help maximize your booth space!


How to Display Products at Art Festivals
Once you have a layout in mind, you'll want to think through your product display. You may find yourself having to get creative to fill your 10'x10' space—I certainly had to when I was first starting out! As your product line grows, you'll find that space becomes limited and you'll need to strategize your product placement. Nowadays, I pack my booth as full as possible. As items sell throughout the day, I move product around and rearrange whatever's left to best show off the work.
Some rules of thumb for creating captivating displays:
- Have a focal point to your booth. Think of your booth as your storefront. You'll want to display the items that catch the attention of potential shoppers.
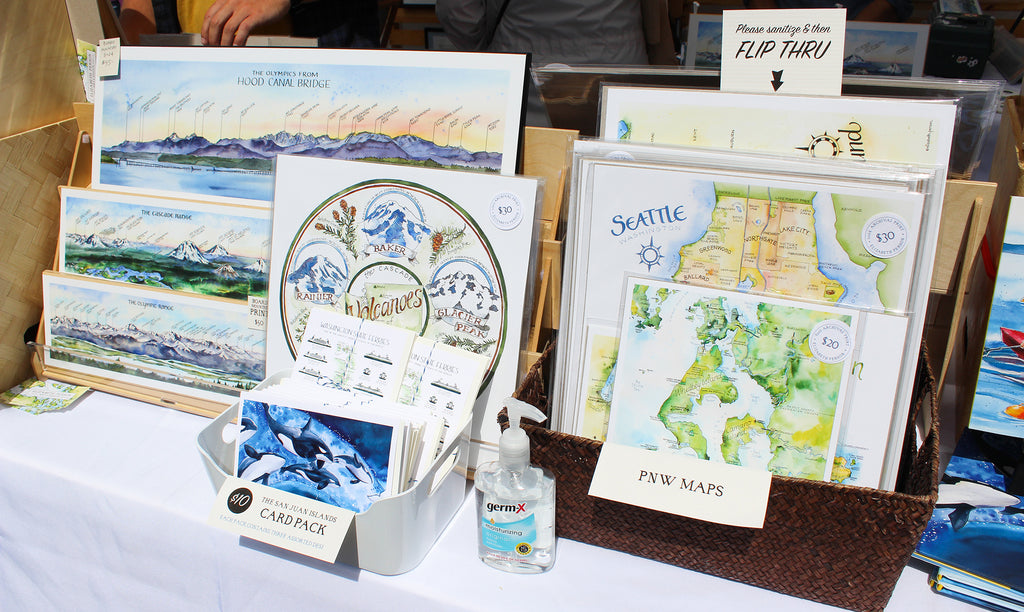
- Make clear signs. Definitely have a large sign with your business name that gives an idea of what you sell. It's also helpful to think about small signage through your booth. For example, I added "flip through" signs to my bins full of prints as an effective way to give customers permission to get diggin'!
- Never underestimate the power of a crisp tablecloth. Plus, it gives you hidden storage area underneath the table for backstock.
- Build your display up vertically as much as possible. An easy way to add visual appeal to your table is arranging your items in various heights and shapes.
In addition to the product you sell, think about how you can best show it off with display items and props. I go for maximum impact with minimal items. I've discovered that nesting boxes/baskets/bins work great because they store small. IKEA is a great resource for neutral colored, inexpensive display items like wooden bins that can be filled with products or turned upside down and used as display platforms. It also sells woven baskets and trays for keeping tiny items tidy, like stickers. I've purchased many of my displays from Clear Solutions and ENM Crafts, which both make lightweight display stands that break down into flat panels. Keep in mind that you want your display to be fairly lightweight because you'll be hauling it in and out for every market. I used to display stickers on cake plates, but stopped because they're bulky and fragile for transporting.
I primarily sell paper prints and framed originals, so after doing some festivals I wanted to display these items more prominently and maximize my booth space. I commissioned my dad to build several display items based on my rough designs. He made two wooden easels for displaying prints, and a wooden back wall with hooks that I use to hang heavy original art. Having custom displays are integral to my festival setup, and I've made transportation adjustments to accommodate their size and weight. I'd suggest investing in display items that suit your transportation capacity.

How Much Product Should I Bring to Art Festivals?
I got some great advice early on that I think about at every festival: Bring twice the amount of inventory that you expect to sell. This will keep your booth looking full and fresh and not picked over. Of course, selling out can be a great thing! But I would rather bring a lot extra and keep selling for the entire festival. This advice also implies that you want to have a sales goal in mind. I carefully track my sales (by product, by hour, by festival) and look over my notes from the previous years before setting a sales goal.
Once I've nailed down my product display, it's time to consider the less visible aspects of my booth. Do I need helpers? Do I have enough cash and coins to make change? What will I eat? How will I take breaks during the looooong festivals days? I'm always so glad to have thought through these logistics before a festival begins!
Another very important consideration for art festivals is the WEATHER! Depending on where you live, you may encounter rain, broiling sun and hot temperatures, wind—or all of these and more! I certainly have in the Pacific Northwest (like that time a thunderstorm rolled through mid-festival and the street flash flooded!) Not only do these environmental factors affect you, but they can also affect your product. When I do an outdoor show, I stock a plastic bin full of supplies I might need in case the weather turns: tent sides to keep rain away, extra plastic sheeting in case my tent leaks, hand warmers and an extra supply of drinking water. In the photo below, I'm using bungee cords to keep my lightweight prints from flying off with every wind gust.

Packing Your Vehicle with Products for Art Festivals
Packing for an art festival reminds me of playing the video game Tetris. Festival load in can be full of obstacles, especially at big festivals or busy downtown locations. Festivals often have very specific load-in instructions, including which streets you can use to access your booth space. Having a well-packed car makes this load-in process so much easier. I think in reverse about how I'll want to set up my booth. I make sure my tent is immediately accessible so I can set it up first. Most festivals require you to take everything out of your car and park (often at a distant location) before you're allowed to set up.
After a few years of doing festivals with my trusty Toyota sedan, I decided to upgrade to a Honda Element for more hauling capacity. Here's a fun, short video that shows my intricate vehicle-packing process. Not a single inch of wasted space!

Photo by EPAD
Setting Up a Booth at an Art Festival
It takes me just over an hour to set up for a small market and nearly three hours for a big festival booth, depending on how much help I have. The more prep I do beforehand, the quicker my setup time. Even when you find a good rhythm for setting up and tearing down your booth, you have to make peace with the fact that these processes can add a significant amount of time to an already long day of vending.
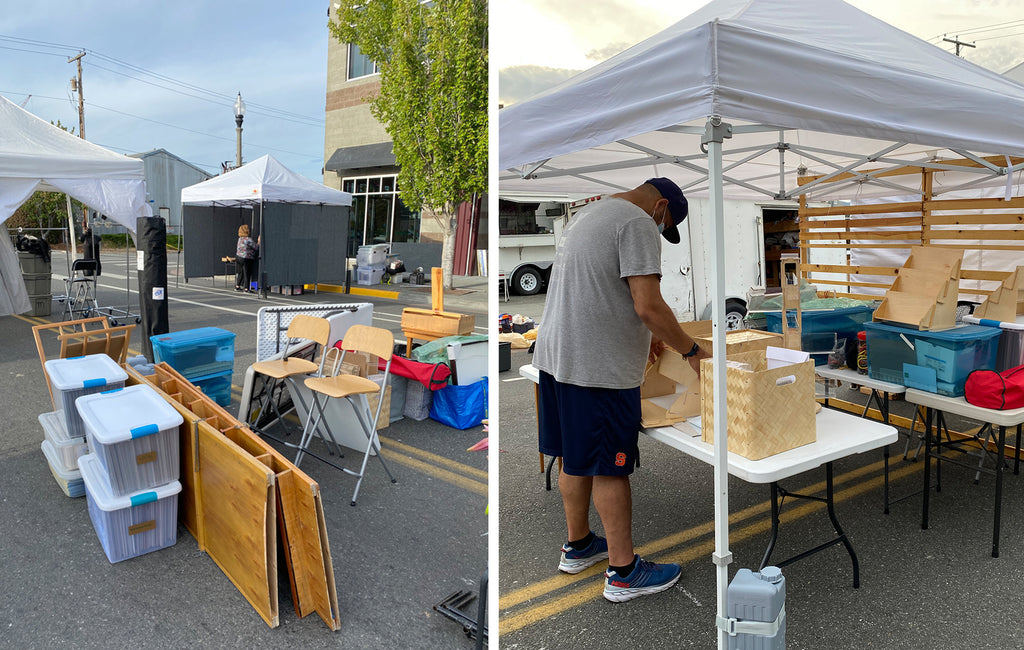
Here are before, during and after photos of my booth setup at a multi-day outdoor festival. I take photos of each booth setup and often reference them for future use.
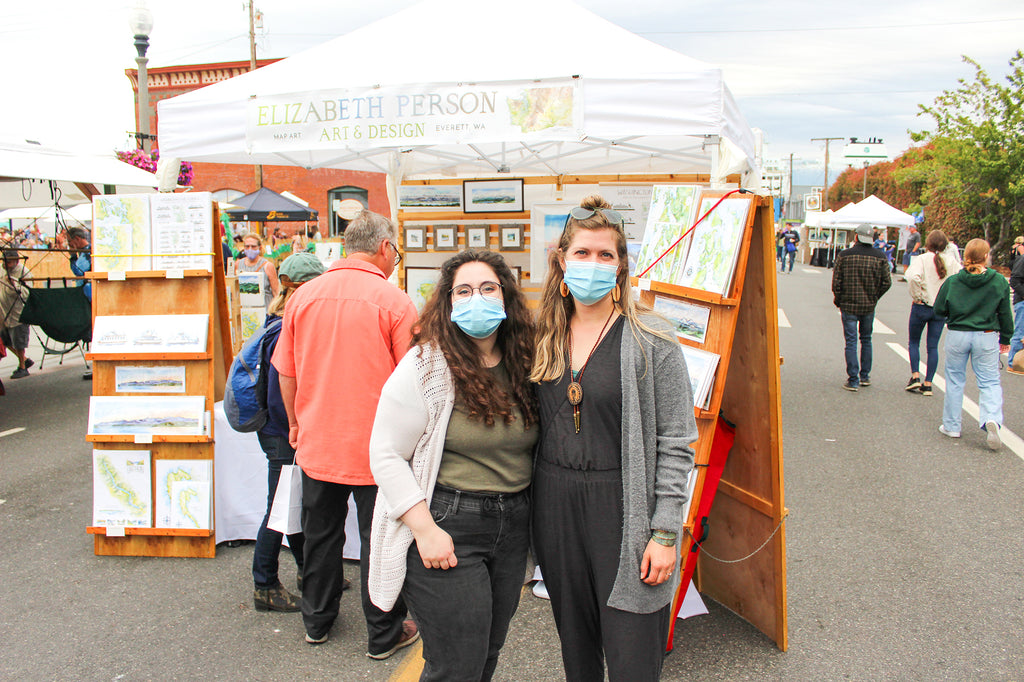
Me and Emily Drummond, my 2021 intern, who took the photos in this blog unless otherwise noted!
A few systems I've developed over the years to make setup, teardown—and everything in between—easier to manage:
- Dedicated supply bin - No matter how small the festival, I have a dedicated tub just for supplies I'll need during the show. I keep it stocked with pens, scratch paper, duct tape, a stapler, charging cords, AA batteries, S hooks/bungees, garbage bags, clipboards, a few tools and more.
- Cart - I have a foldable rolling cart (like this one) that I use all the time. It saves my back when making many trips from the car to the booth.
- Waterproofing - Since I live in a rainy part of the country, I waterproof my booth and product as much as possible. I keep plastic bins of product under my tables, and put each bin on either a small tarp or on it's own lid, in case it starts raining and water runs through my booth.
- Signs folder - I keep all my signs in a file folder, based on category. These signs identify prices, discounted items, original work and accepted payment methods.
- Extra product storage - I used to keep my prints in clean pizza-style boxes, but it got difficult to track down prints as my product line grew. I now have a file folder-type system for storing my prints in plastic bins. It's much easier to flip through and see what I have in stock!

It's Festival Time!
Meet your booth neighbors and take note of their names and crafts. It's likely you'll vend with them again in the future. If possible, try to meet the festival organizers in-person and introduce yourself as well.
If you have time, it's a good idea to walk the festival grounds so you can help customers find restrooms, food areas and other important places and information. Plus, it's a great time to scope out booth layouts and get ideas from experienced vendors and beautifully designed booths.
Then, it's time to sell! If I make a sale before the festival has officially begun, I take it as a good sign that it will be a busy day. On the other hand, slow days remind me that not every day—or festival—will be a hit. Either way, I take comfort in knowing that my audience always has a way of finding me!
One of my favorite parts of working festivals is talking about my work with excited and engaged customers. I often meet aspiring artists of all ages and delight in talking shop and encouraging their artistic pursuits. It's easy to get swept up in conversations throughout the day, which is why it's important to make it a habit to take time to eat and catch some fresh air. Luckily, most festivals have volunteer booth sitters to watch your booth if you need to step away at any point during the festival.
During multi-day festival, I make sure to bring home any electronics to charge overnight, like my phone, card reader and backup power banks. Depending on the weather, festival location and security setup, I might also pack up my product and any valuables for load out at the end of each day. More typically, I take product off the walls or shelves and store below my tables for overnight, simply to protect from morning dew, overnight rain and theft.


After the Festival
The event may be over, but there's still plenty that needs to be done before (officially) calling it a day! Of course, there's tearing down the booth at load out. This process can be as busy and fast-paced as load in, but hopefully you'll have a lighter load with all the product you've sold. It's important to note what worked well and what didn't, to improve your next festival experience. I usually end my festivals with a sales summary sheet and a deep dive into my stats to learn about my latest performance. When I return to the studio, I adjust my inventory and record everything that sold.
I usually take the day following a festival off—typically a Monday. This is surprisingly hard to do, as I'm usually excited to get back to the studio. But I've learned that letting myself catch up on sleep and not thinking about art/business for a while is really healthy. Festivals are very physically and mentally demanding and a day or two of rest is 100% necessary for me. I find festivals both energizing AND exhausting—and completely essential to my business.

Photo by EPAD
I hope this blog is helpful in sharing my end-to-end experience with creating a booth to sell at art festivals. I'm always learning. In fact, I'm about to have my first double booth (10'x20') at a festival and I'm sure I'll have lots of insightful takeaways. I look forward to many more art festivals in the future and seeing how my booth setup process continues to evolve. I hope to see you at a festival soon!
See my upcoming events here.