
Illustrating My First Children's Book

Illustrating To Live on an Island
In 2017, I opened my email and read one of the best messages I’ve ever gotten: “I’m reaching out to ask if you may be interested in illustrating a 32-page children’s picture book that I’m working on about the San Juan Islands.”
Like many aspiring artists, it's been a dream of mine to illustrate a book since childhood! As a kid I spent hours every day pouring over books and their illustrations, and drawing “supplemental” scenes and characters from my favorite stories. I couldn't believe the children's book editor at Little Bigfoot, the children's imprint of Sasquatch Books of Seattle was contacting me for consideration!
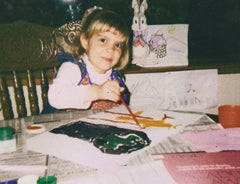
Five-year-old me, illustrating scenes from Sesame Street
To Live on an Island by Emma Bland Smith came out two years ago in May 2019! I want to share more about the exciting process behind illustrating my first children’s book.
How it began
In 2017, I made the leap from my day job to doing art full time. One of my first projects was illustrating a children’s book! The children’s editor at Sasquatch Books had purchased a manuscript from author Emma Bland Smith and was looking for a watercolor artist who lived close to the San Juan Islands.
My “interview” was to submit sketches of a main character to the publisher. After reviewing my work, Sasquatch officially asked me to illustrate the book! We negotiated a contract, I was given an advance and the deadlines for the book were assigned. Below is the announcement in Publisher’s Weekly!

Book Research
I was given a manuscript with the page splits and the author’s notes on the visuals. I then spent three full months illustrating the book.
I started out my visual brainstorming by thumbnailing - making small, quick sketches. I checked out many of my favorite books from the library. I started thinking more critically about what attracted me to books when I was younger. As an ode to two of my beloved childhood author/illustrators, Graeme Base and Jan Brett, I got the idea to include at least one animal on every spread.


Mapping out the book spreads "roughs" followed by taking hundreds of reference photos on Orcas Island, in the heart of the San Juan Islands!
I knew I would use ink and watercolor to illustrate – my usual medium. But my big challenge was to create full scenes with wall-to-wall color, a consistent look to the character and a clear sense of the island setting. A field trip to the book setting, the San Juan Islands, was in order! My mom joined me for an all-day outing to Orcas Island, where we explored the natural beauty of the island and had dinner with friends before taking the ferry back home at dusk.
After doing all this research “homework” I was ready to create the rough sketches – called roughs – for the book's blueprint. I submitted these roughs to my editor for approval. I was asked to turn one of the roughs into a finished full-page spread, before diving into all the illustrations. I had a very clear vision for one of the final scenes where the manuscript says, “you may count Orcas, not sheep, to get to sleep.” I submitted this Orca Dreams spread and got approval to begin the other 16 illustration spreads.


Perhaps surprisingly, I didn't have any direct contact with the author. She gave input on my sketches, but all edits and final approval came through the editor!
The Illustration Process
Using my reference materials, I pieced together each layout. I sketched with pencil, then ink. Lastly, I added the watercolor. My editor wanted me to use bright colors, so I painted everything brighter than my reference photos (taken on a dreary February day!).
Here’s photos of how I illustrated the main character in the “Driftwood” spread.

Every spread has a factual bar of extra information about the spread topic. This page has interesting information on driftwood, so I did extra vignette illustrations for each fact box according to the topic. Below are examples of the illustrations, as well as the placement of the ferry vignette on the final "Ferry" spread.

A local family agreed to model for me so I could more easily and accurately draw the elaborate scenes I’d come up with. It ended up being enormously helpful to have these reference photos.
Here’s an example of a rough sketch, the reference photo I took of models, and the final drawing.

16 spreads later, the bulk of the book illustration was complete. I uploaded everything to the publisher and then… waited. A month later, I got my first round of feedback and edits. Thankfully the edits were minor, so they didn't require redoing any of the spreads.

Next, I worked on the book cover. I submitted several ideas but, in the end, went with my editor’s idea of the main character kayaking. I submitted the cover and was asked to create a completely different version they found to be livelier (and to add a life jacket). It was a humbling experience, but I was much happier with the second version. My editors were right!

There were a few more illustrations need: the endpaper, title page, copyright page, and supplemental map of the islands. Meanwhile, the graphic designers at Sasquatch Books started the layout. I saw a few drafts and give my feedback on the layout before the final book was sent to the printer.
Releasing the Book
It took a little over a year from submitting my illustrations until book was released. And from the author’s perspective – it took even longer between writing the book, getting the manuscript purchased by a publisher to seeing the printed book!
It may seem like a children’s book is author + illustrator = book. But, it’s more involved than it looks! It requires
- Editors, to make important choices
- Designers, to make the book layout look interesting and inviting
- Marketers, who get the word out about the new book
- Distributors, who get the books from the publisher to business,
- And lastly…businesses. From big stores like Costco to your small neighborhood bookstore that carry the book on their shelves for you to buy!

I found the book at Barnes & Noble!
Parting Thoughts
Illustrating a children’s book was A LOT of work! I found the process challenging, overwhelming, exciting and rewarding. Illustrating something I was very familiar with – the San Juan Islands – made the project much easier. I learned so much during this process and I'm grateful for the opportunity. I look forward to more illustration projects in the future. Want to check out the finished book? You can purchase copies of To Live on an Island directly from me right here.

Since this project, I’ve gotten to contribute illustrations to more books:
- Chapter illustrations in House Lessons, a memoir by Erica Bauermeister
- Maps for Uncharted, a sailing memoir by Kim Brown Seely
- A map in the young reader book A Whale of the Wild written by Rosanne Parry and illustrated by Lindsay Moore
P.S. I made a coloring page based on the book - download it here!
